Simple plant hanger
This is a simple plant hanger. The only knot I used is the thumb knot (or overhand knot.) That is the knot nearly everybody knows as 'a knot'.
You have to work a little careful but everyone is able to make it. In the '70 a lot of children made more difficult plant hangers.

If you are not able to make this it is my fault in explaining.

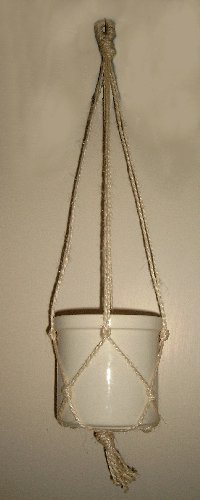
Take strings long enough to go from the bottom of the pot, over the hook you want to put it on, back to the bottom of the pot and a little extra for the knots and the frayed end. So if the bottom of the pot will be 50 cm (20") away from the hook, you cut the string at 120 cm (50"). You need 8 of those strings.
Make a knot in each end to prevent fraying.

Tie the strings together in the middle, I have done that with a piece of string wound around them. Tie a knot directly below that, the ends of the short string go in this knot as well. Cut the ends of this short string short under the knot. If you think working with an extra piece of string is hard, take a ring and pull all your strings through this ring and tie a knot just below this ring.

Divide the strings in 4 sets of 2 and make a knot just under where the top edge of the pot will be. If you have the right kind of pot at hand you can work on it, to do that you can tape your strings in 2's at equal distances around the top edge of the pot.
Split each set of 2 under the knot and tie a knot with one string from the left and one from the right.
Tie knots where the schedule gives red dots, at the blue dots you need to tie one string from the one side of the drawing with one from the other side. Easy if you work around a pot but hard to draw. Keep 8 cm (3") between the knots for a big flowerpot, at least 5 cm (2") for a small one, or try and if it does not fit, undo and move the knots.
In the photo I have used 3 rows of knots, in the drawing 4, both are right but 3 rows is the minimum.

Tie one knot in all the strings, about half the distance between rows away from the last row, a little more is OK. Try the plant hanger with a pot the size you want to use it with. If there is something wrong, you may still change it.

To finish off neat you can undo the knots at the ends of the strings, cut them to length and fray the ends, or leave the ends as they are if you think they are right now.

I used sisal for this plant hanger but you can use many kinds of string. With this simple hanger even the amount of work stays the same with each size of string. Be careful the string is strong enough. I would not use wool but knitting cotton should do. If the string is very thin, use 2 strings for each 1 in the description.

Good luck!


Knots used
How to make....
thumb knot or overhand knot
 
Back to start. one step backwards.
©Willeke 2003